Honda Shadow Series Installation
Instructions and Helpful Hints.
Neck Trim Installation 01-302
Left Frame Cover
Installation 01-305/308
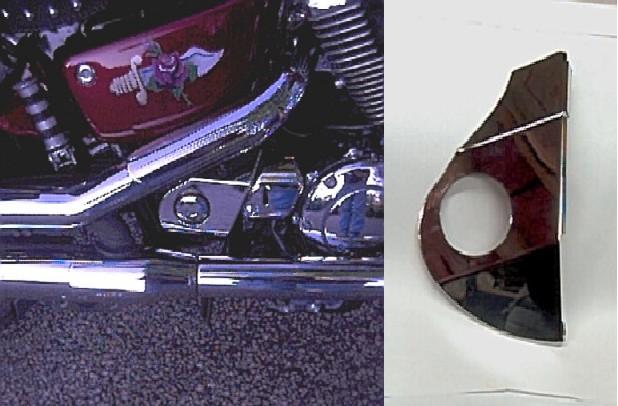
Right Frame Cover 01-3081
Left Frame Cover Installation.
Custom World Part number 01-305
/ 01-308
Picture is of
01-305, the 01-308 for the Spirit 1100 installation is virtually identical.
To install your new Custom World
Left Frame Cover:
-
Loosen the Front Chrome
cover. Removal should not be necessary.
-
Insert the Mounting
Bracket left side first.
-
Slightly tap the left
side of the mounting bracket between the frame and the front chrome cover.
-
After the U portion if
the bracket is positioned behind the frame, make sure the 2 front clips line up
with the mounting holes in the frame cover.
-
Install the rear pivot
bracket and securely tighten.
-
Tighten the front
chrome cover back up.
-
Install the new Left
Frame cover. Make sure the Alignment is correct, then tighten.
-
You can adjust if
necessary using the slots.
The end result is a very
secure frame cover that looks good and can be taken off easily.
Picture shows a mounting
bracket installed and the back side of another bracket being
held above the installed bracket.
Tools required, 4mm allen / or 5/32,
Small rubber mallet,
10 mm wrench
|
 |
 |
Neck Trim
Installation, Custom World Part number
01-302
To install your new Custom World
Neck Trim:
-
First thing, Remove the seat.
-
Next remove the front and rear gas tank mounting bolts.
Lift tank up and slide back.
-
Remove the plastic stock covers.
-
Figure out proper orientation of the left and right covers.
The Tab on the new covers will be pointing towards the tank. You will only
be using one mounting bolt now per side. The mounting bolt will be covered
pretty much by the gas tank.
-
Replace the plastic nuts with the U-Nuts provided in the
appropriate position.
-
Use a little RTV to hold the rubber spacers on the back side of the
neck trim. This isn't necessary but a good thing to do, especially if you
were to drop one.
-
Custom World used to also use some double sided tape at
the tab. This isn't really necessary because it is held on quite securely.
If you do want to use something more, some industrial velcro works really good.
This is helpful on the right side, in case you need to get back in there for
access to your radiator cap.
Picture shows the shows a close
up of frame cover installed and mounting bolt to the upper right. |
 |
 |
01-3081 Right Frame Cover
|
To install your new Custom World Right Frame
Cover:
-
Start by sticking the half moon cushion one inch
under the round chrome cover with the straight side at the top. (see arrow)
-
Hold the cover in place to make sure it fits.
-
Remove the cover and take off the papers covering the glue and install the
cover.
-
Apply pressure on the cover for a few minutes.
-
Wait 24 hours before
starting motor to assure proper adhesion.
|
 |
 |


Copyright ©
2002-2006 Value-Accessories