
440-259-4793 Toll Free 888-532-0166
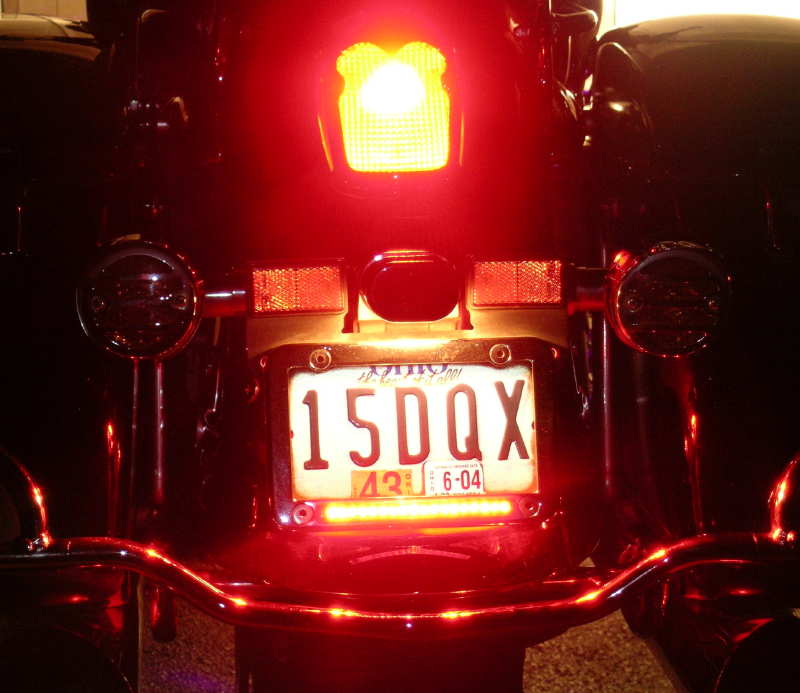
LED License Plate Frames
Wiring
We have
assembled some helpful installation Tips & Instructions to go along with the
general instructions for Signal Dynamics
LED License Plate Frames.
These
instructions will be useful for any type of lighting you may be installing.
-
Radio Shack has Heat Shrink, Wire, Electrical
tools, Soldering Irons and Solder. If you are unsure of what type of
Soldering Iron and size you need just ask, they usually have a good
selection of different sizes and types available. They can also fix
you up with a small heat gun for shrinking heat shrink.
You also really need some type of Multi Meter to check for voltage. You can
pick up a decent Digital Multi Meter from Radio Shack or even
Sears for between $25 to $40. There are cheaper ones but the ones in this price range are easy to use and
will take care of anything you need for a long time.
- You should be able to find a wire that has 12 Volt DC on it when your
lights are on. You can start in your rear light
assembly, you can also look under your seat or right side cover. You should also find a ground wire in there. You
can verify the ground wire by checking continuity (zero ohms) between that and ground or
battery ground. Hopefully you can also get at the brake light wire in the
light assembly. In a lot of Honda models the light assembly above the
license plate bracket contains only the running lights and ground. If this
is the case with your bike also, you have another easy option. You can
find the brake light wire under your seat or in a lot of cases under the right
side cover. Just trace the wire bundle back from the rear fender and check
for 12 Volt DC when the brake is pushed. You can then tie into the brake
light wire and run a wire back with your wire bundle under your fender.
The wire that you install will come out with the wire bundle to the rear light
assembly.
- The easiest and best looking way to install the wiring is to use
heat shrink over the supplied wiring on the LED
license plate. Use just enough heat shrink to cover the length of all of
the wires together coming from the frame and into the light assembly.
- In a lot of cases it is very easy to drill a small hole in the bottom
of your light assembly. Make the hole just large enough to get the wires
with the heat shrink around them though. After you get the wires into the
light assembly you can tie into the Ground, Brake and
Running light wires.
You can get a very professional installation by just taking a few minutes to
plan and do a nice neat job.
- I would suggest using the License
Plate Mounting Hardware
that is available (some come with it, some are extra). It is the exact size that you need and gives a very
finished look.
- If you would like to go one step further and have
your LED's flash when you brake, install one of the
BackOFF Brake Signal Module's. If using a
Duel LED, you can even use a
BackOFF XP or
BackOFF WigWag to modulate the LED's
separately.
Rick,
Value-Accessories
Copyright © 2001-2010 Value-Accessories
 Click Here
to enter our On Line Store!!

Below are the Instructions supplied by Signal Dynamics for installation of
LED License Plate Frames.
Before beginning make sure your brake and
running lights are working properly.
Note: For this installation example we are
using crimp type wire connectors (Not included). The use of these connectors
is optional. The other accepted method to splicing wires is to solder them,
and then use heat shrink tubing to seal them. In either case we have
provided ample lengths of wire to splice our LED Products into your bikes
electrical system. One further note of caution, if any bare wires are
exposed as a result of this installation, wrap the exposed wires with
electrical tape to prevent any possibility of a short circuit.
Using a test light, locate and note the
color of the brake light "hot" (+) wire. This wire will cause the test light
to light when the brakes are applied, and go out when they are released.
Also locate one of the wires in your running light system. This wire will
cause the test light to light when the running lights are on, and go out
when they are turned off.
Connect the three wires
from the LED Product to your bikes wires as follows:
- Black - Ground
- Red - Brake Light
- White - Running Light
|
 |
Operation:
- When the
LED Product's black wire is connected to ground, and the white wire is
connected to a 12volt power source the LED's will light at low intensity.
- When the LED Product's black wire
is connected to ground, and the red wire is connected to a 12volt power
source the LED's will light at high intensity.
- When the LED Product's black wire
is connected to ground, and both the white and red wires are connected to
a 12volt power source the LED's will light at high intensity.
|
Return To
Value-Accessories Home Page


![]() Click Here
to enter our On Line Store!!
Click Here
to enter our On Line Store!!
![]()

![]()